(Page still in progress)
Table of Contents
Make sure the original tint comes off
Not all tinted CRTs use removable film. Sony is a good example: most Sony tubes do not use any external tint film - even the dark ones. The dark tint is infused with the glass and has to be sanded off as a layer. This sanding process is very time consuming (and dangerous) and I do not recommend attempting it unless you know the risks and understand what you are doing.
To check if your tube has removable tint, first check to see if the chassis or tube model is listed in our Database. The specifications table will list the tint as removable if we have verified it. If it's not listed then you will have to find out yourself.
To find out yourself, you need to be able to see the edge of glass on the face of the CRT. Some pro monitors (like the Sony PVM 20L5) allow you to remove the bezel from the front of the display to expose the tube edges without any further disassembly, but in most cases you will not be that lucky. Majority of CRTs require you to take the CRT out of the chassis completely to visually see the edges of the front glass face.
Once you can see the edges, it will be easy to tell if there is a layer of film covering the glass. If you don't see an edge of plastic near the edge of the glass then likely whatever level of tint the CRT appears to have is infused with the glass. If you think you see an edge, you can test lifting one of the corners using a stainless steel razorblade edge.
Required Materials
- Pack of Stainless Steel single-edge razor blades
- Low-profile razor blade holder (such as this)
- Compressed air can
- Microfiber towel
- Latex gloves
- Credit card or other similarly hard thin plastic
- A small tint squeegee (such as this)
- Spray bottle (preferably a brand new one, or sterilize the one you have)
- Johnson & Johnson's baby soap.
- Window Tint Roll
Choosing the right window tint
As a general rule you should try to match the level of darkness the original tint had. I have never seen anything darker than about 30% VLT used, so I would consider that to be the ground floor. The higher the % VLT number, the lighter the tint is, and thus more light is allowed to pass through in both directions - from the CRT and from ambient light. The darker the tint is, the better your blacks contrast will be and the better the glare reduction will be, but you have to make sure the tube is bright enough to shine through it for proper upper contrast levels. That's why I recommend matching the darkness of the original tint as best as you can. Order tint samples if you have to - most sites will send samples for a few bucks.
Removing the existing tint
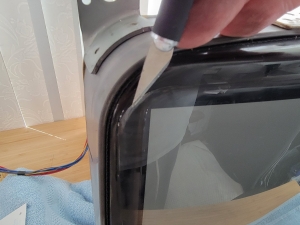
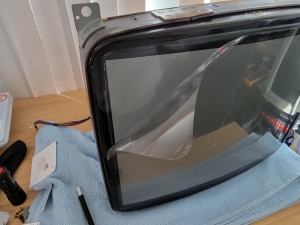
Use a fresh razorblade and slide it under a corner to start the peel. Then continue pulling with your hands, taking care to keep the film coming off in one piece.
Sometimes you might find that the film doesn't want to come off in one piece, or it leaves behind lots of residue. Keep replacing your razor blade with a fresh one and scrape away at it, eventually you'll get it all off.
Cleaning the glass
Prep work:
- Put on your latex gloves to avoid leaving fingerprints on the glass or the tint.
- Unroll some of your window tint and cut off a square large enough to cover the whole glass surface with excess of at least an inch past the edge in all directions. Set this aside and take care not to let it crease or get dirty while it waits.
- Fill the spray bottle with warm tap water, put a few squirts of baby soap in there, close the lid and shake it for 15 seconds or so.
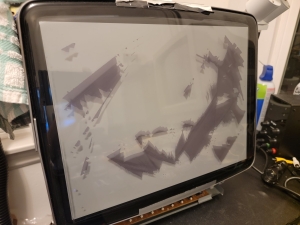
Spray liberally on the glass and use your squeegee to swipe the suds away. Repeat this process several times (the more the better until you're absolutely sure its as clean as it can get. Use your microfiber towel to dry it off so you can inspect to make sure its really clean, fingerprint free, etc.
Applying the new tint
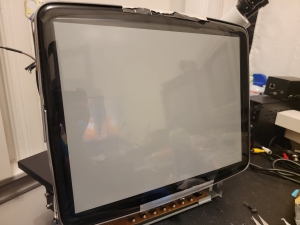
Now spray it again, spray over it with compressed air, then spray it again with water. Apply your sheet of tint over it, curling side down (meaning the side it wants to roll up into should be on the glass). spread it out flat with your hand. It should have some level of adhesion with the glass now - not permanent but at least some surface tension. If you don't have any adhesion you need to add more soap to your spray mixture.
Now carefully peel the backing layer away from the tint and then spray the exposed surface of tint liberally with your bottle. Quickly lift it off the glass, turn it around and apply it to the glass surface. Spray more with your bottle and start using your squeegee to flatten it out and work out the air bubbles. Once you've got it in place and have some of the bigger bubbles worked out, you can start to cut the edge of the film off. You'll use your stainless steel blade for this. Go slow and be liberal with how much excess you leave past the light surface of the tube into the black area of the glass. Leave as much tint in the black area as possible so that you don't have any exposed untinted glass near the edge of the bezel when you put everything back together.
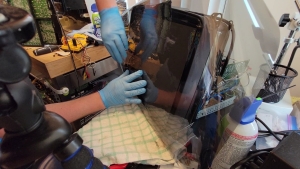
Once you have the excess tint cut off you can start to really work all the bubbles out with your squeegee. Keep the surface wet by re-spraying it regularly so that you don't mark up the tint with the squeegee friction. This step is going to take the most amount of time.
If you find that there is a stubborn bubble, try working it away with a credit card or similar harder plastic. If it still won't go away, the bubble may actually be debris under the tint that won't go away with the squeegee. In this case you can try lifting off the tint from the nearest corner, spraying fresh water on that spot of the tint, and using your finger to swipe away the debris. You may find that even this isn't enough to get rid of the imperfection in that area, and in that case you will have to start the whole process over again with a fresh cut of window tint. In this case, try to use even more spray on each step and be extra thorough with your cleaning. When I did this the first time it took me 5 attempts to get a perfect tint, and after I got the technique down I was able to do a perfect job in one or two attempts. Don't expect to get it perfect on your first attempt, but do experiment and try to learn from your mistakes before you run out of window film :)
Any remaining small bubbles will work themselves out overnight if you just leave it, but try to spend as long as you can mentally stand sitting there working them out yourself before trusting time to take care of the rest. And again, if you aren't happy with the results don't be afraid to try again, as discouraging as that may sound. Like I said it took me 5 tries to get it right.
Final Result and Thoughts
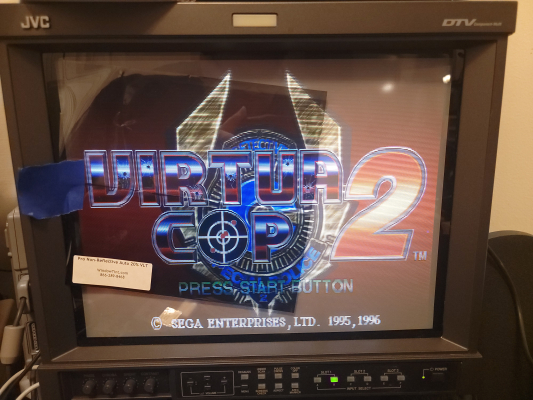
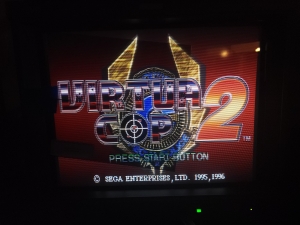
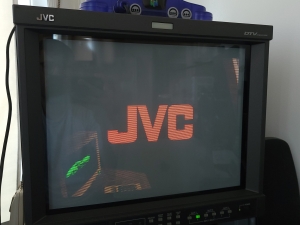
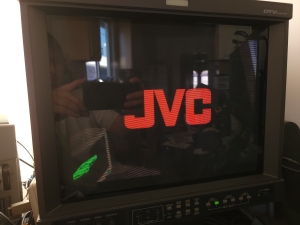
Notice how in the after-picture you can actually see the scanlines of the faint scene behind the JVC logo. Both shots were taken at the same scene, but the contrast is so poor in daylight without tint that you can't see scanlines anywhere but the brightest parts of the scene. And the bright colors look completely washed out. The after-picture was taken in a similar amount of ambient light and you can see the colors are vivid, the black is closer to true black, and most of the details are visible in the background. The difference is quite drastic and impressive.
 This work is licensed under a