
Table of Contents
Outline
Why do a WPB?
- Sony monitors compatible with DAS use a bespoke method for digitally controlling RGB gain and bias:
- When the contrast is adjusted, gains can fluctuate. Respectively, when brightness is adjusted, biases can fluctuate.
- In an effort to counter this effect, these Sony monitors are calibrated with two separate “high” and “low” steps for gain, and the same is done for bias.
- With these high and low values defining a set range, the monitor uses a formula to calculate ideal white balance depending on the contrast and brightness controls set by the user.
- In practice, this system has been shown to poorly adapt to the aging of the CRT and passive electronics.
- Even models with the “expert” color controls are often too far drifted to correct with the provided ranges, so a full pass of the WPB procedure is necessary.
Why is a meter needed?
- The formula used to calculate RGB gains and biases is specifically dependent on the color coordinates defined by the DAS program.
- If the WPB procedure is performed inaccurately or deviating from these coordinates, the resulting RGB values will be skewed, and will change with adjustments to brightness and contrast.
- Specifically, the bias steps are performed at a low luminance target, which is very difficult to confirm visually.
What are the steps involved?
- On DAS compatible monitors, the G2 / Screen voltage setup step is done as part of the WPB procedure.
- The optimal method is to visually confirm (by eye) that a 1:1:1 RGB value is discernible from the pedestal / black level.
- When calibrating each of the preset color temperatures, there are several steps that require measuring with the meter while adjusting values with DAS in real time to reach a specified target.
Initial Steps
-
Allow the monitor to have warmed up for 1 hour
-
Open the procedure menu: Adjustment > Procedure then select the White Balance Adjustment procedure
-
DAS will request a certain resolution, and that you adjust size and center for that resolution. This is unnecessary for adjusting white balance. Click OK to continue past this step
-
Click OK on the next step asking for the monitor to be warmed up
-
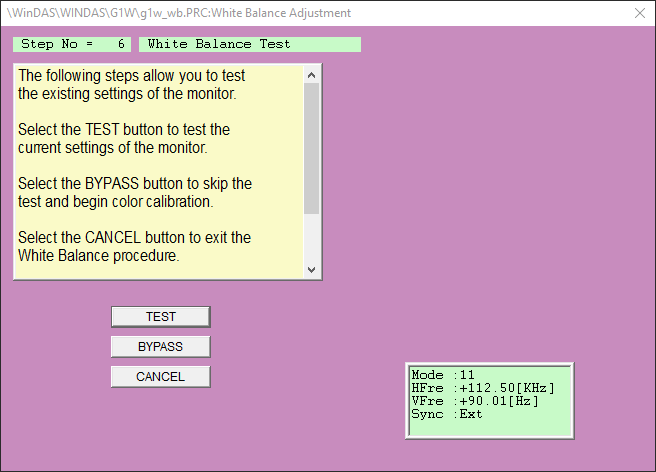
Click BYPASS on the White Balance Test
-
Next, the program will provide some adjustment tips that are more applicable to the originally intended color analyzer hardware. Click OK on these steps
-
Finally, a warning is issued about exiting the WPB procedure. Click OK to proceed
9300K
-
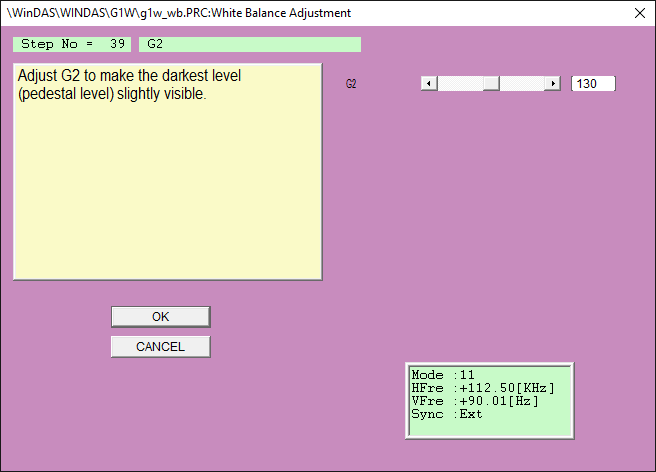
For the G2 step, open blacktest.png and adjust G2 until it’s as low as possible but the first square labeled 1 is still discernible from the black background
- Some monitors have a similar step following the G2 voltage, simply perform the same method used before
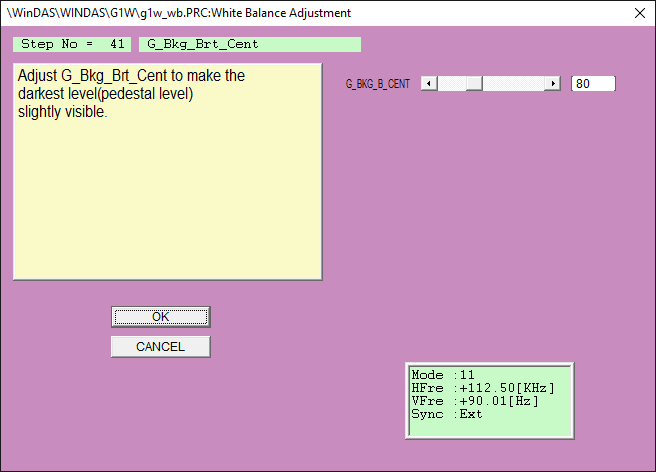
- Some monitors have a similar step following the G2 voltage, simply perform the same method used before
-
Open HCFR in DVD manual mode
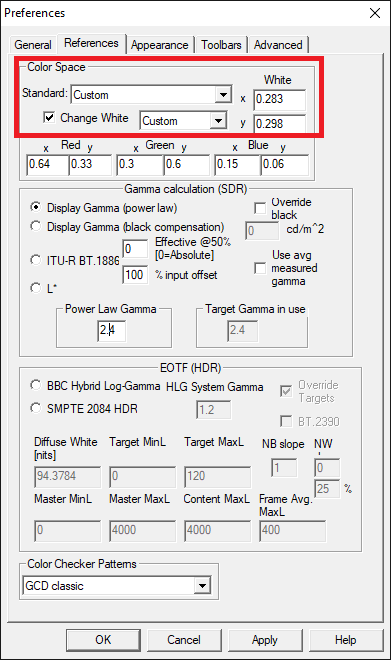
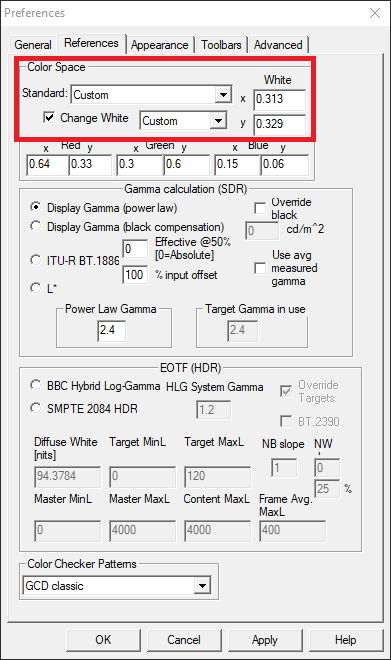
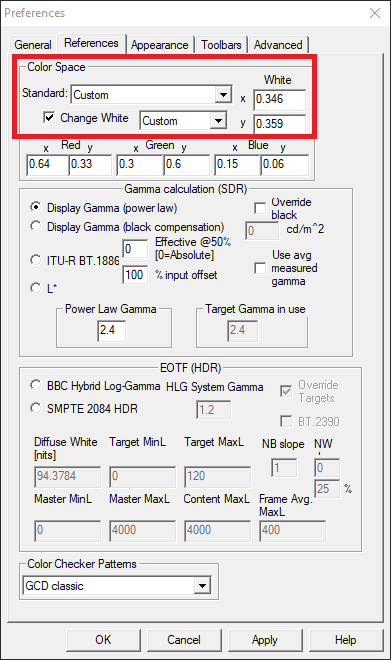
- set the references:
-
Adjust Cutoff Maximum
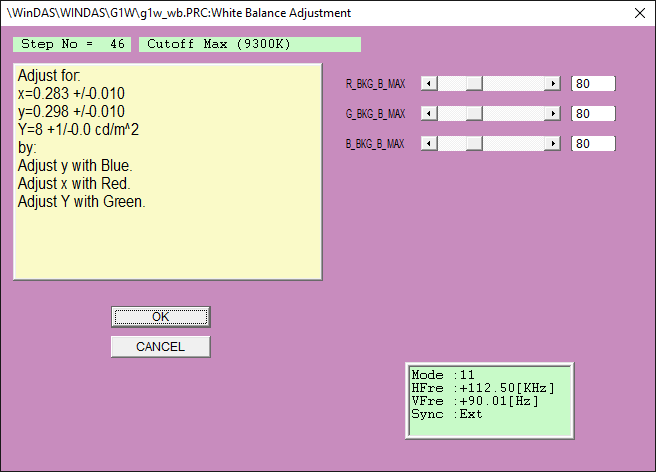
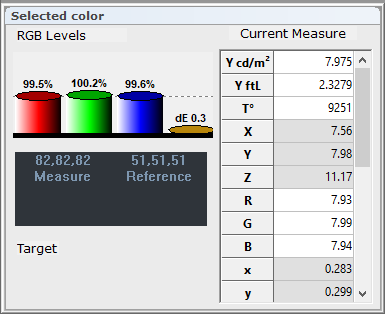
- click any IRE value besides 0 and start a continuous measure
- Match the target luminance and prioritize lower dE
-
Close the current measure, and reopen HCFR in automatic mode
-
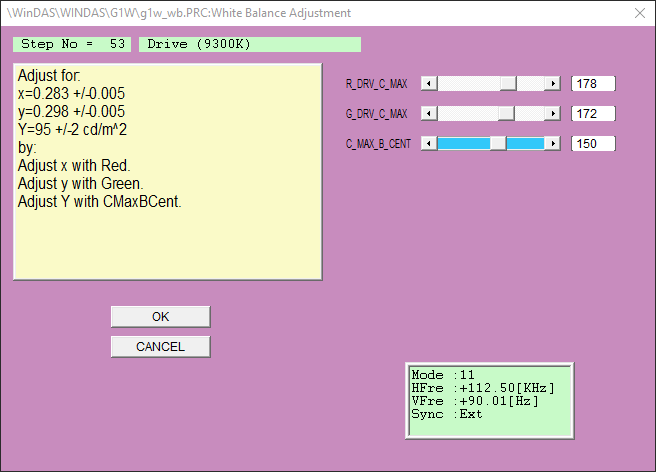
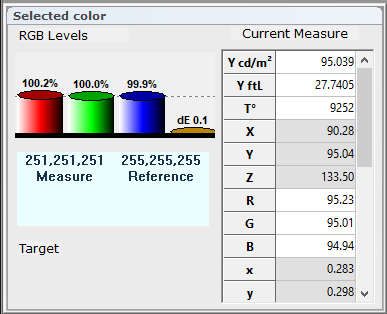
Adjust Drive (first round)


- Click on 100IRE and start a continuous measure
- Match the target luminance and prioritize lower dE
-
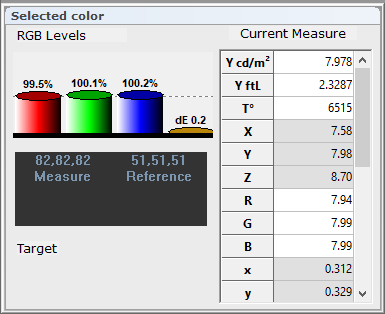
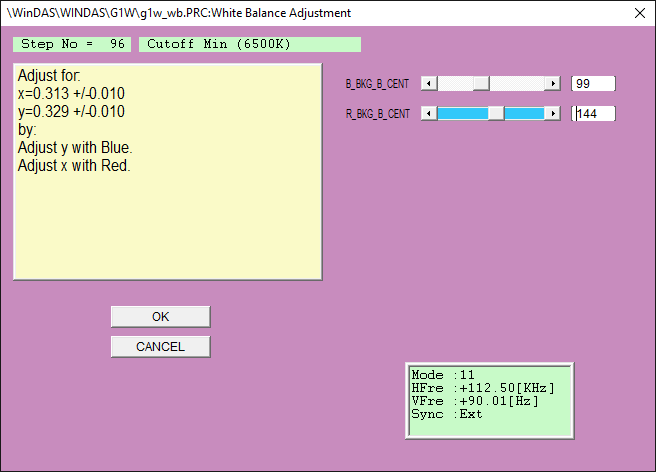
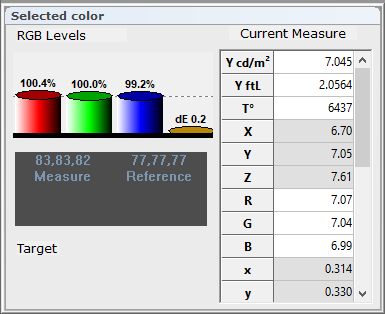
Adjust Cutoff Minimum
- Click on 30IRE and start a continuous measure.
- Prioritize lowest dE
-
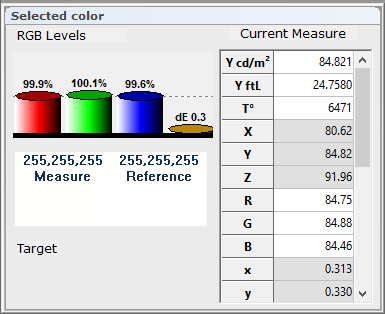
Adjust Drive (second round)
- Click on 100IRE and start a continuous measure
- Match the target luminance and prioritize lower dE
-
Check Luminance
- Click OK to continue
-
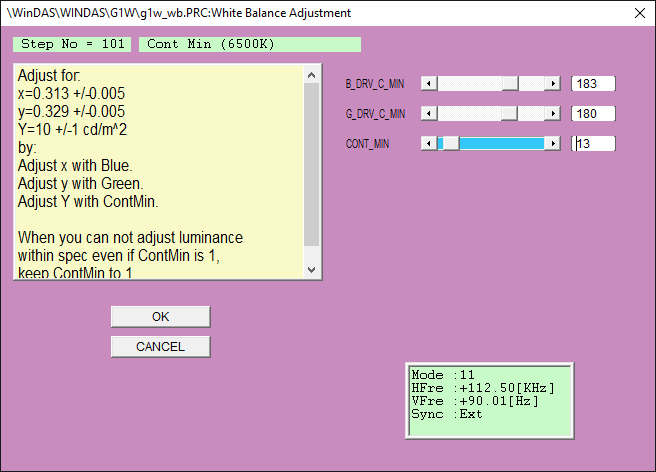
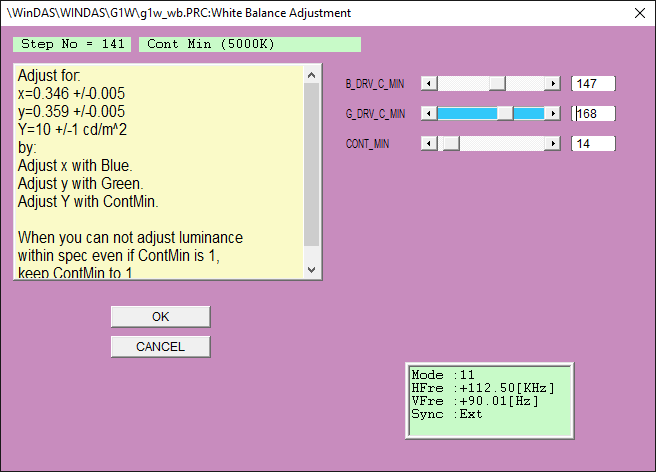
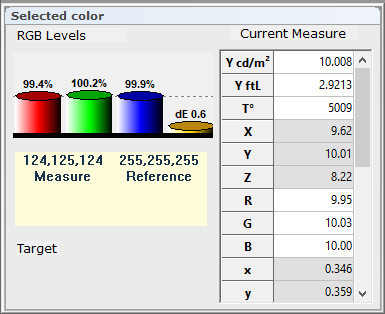
Adjust Contrast Minimum
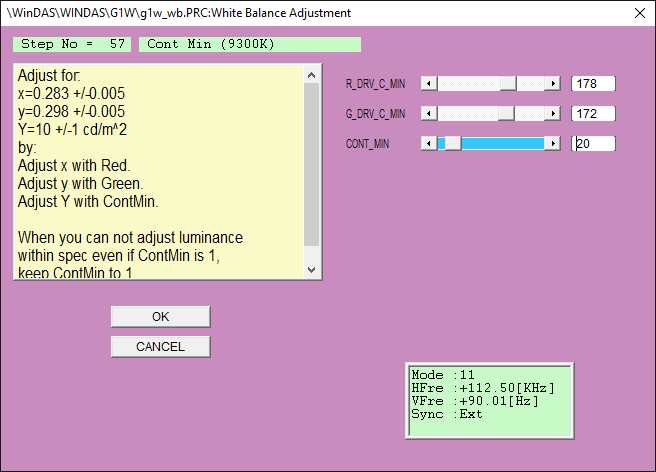
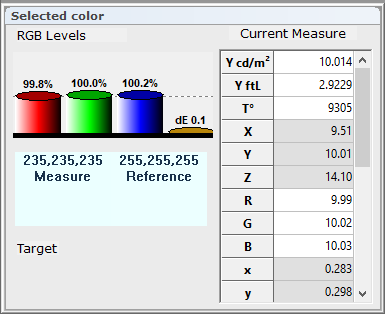
- Continue measuring on 100IRE
- Match the target luminance and prioritize lower dE
-
Wait for the luminance to stabilize
- Continue measuring on 100IRE
- Wait around 15 to 30 seconds for the luminance to stay consistent
- Click OK
-
There will be several prompts to confirm tracking
- Click OK to continue through to the next color temperature
6500K
-
Open HCFR in DVD manual mode
- set the references:
-
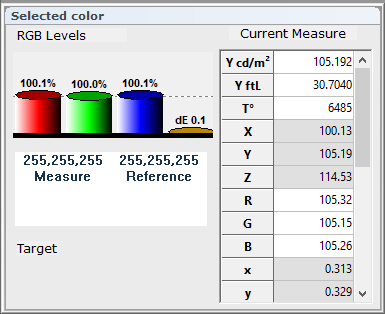
Adjust Cutoff Maximum

- click any IRE value besides 0 and start a continuous measure
- Match the target luminance and prioritize lower dE
-
Close the current measure, and reopen HCFR in automatic mode
-
Adjust Drive (first round)

- Click on 100IRE and start a continuous measure
- Match the target luminance and prioritize lower dE
-
Adjust Cutoff Minimum
- Click on 30IRE and start a continuous measure.
- Prioritize lowest dE
-
Adjust Drive (second round)
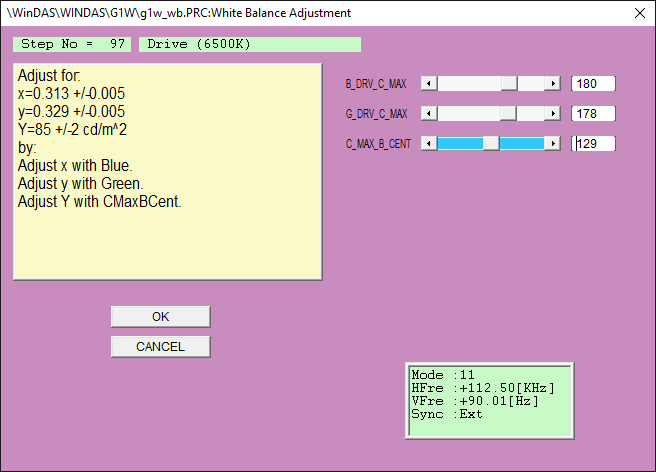
- Click on 100IRE and start a continuous measure
- Match the target luminance and prioritize lower dE
-
Check Luminance
- Click OK to continue
-
Adjust Contrast Minimum
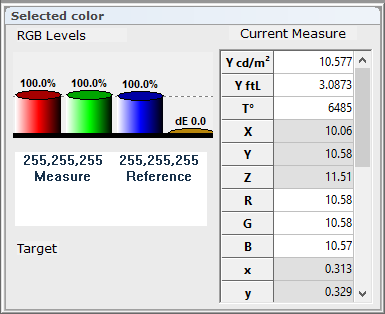
- Continue measuring on 100IRE
- Match the target luminance and prioritize lower dE
-
Wait for the luminance to stabilize
- Continue measuring on 100IRE
- Wait around 15 to 30 seconds for the luminance to stay consistent
- Click OK
-
There will be several prompts to confirm tracking
- Click OK to continue through to the next color temperature
5000K
-
Open HCFR in DVD manual mode
- set the references:
-
Adjust Cutoff Maximum
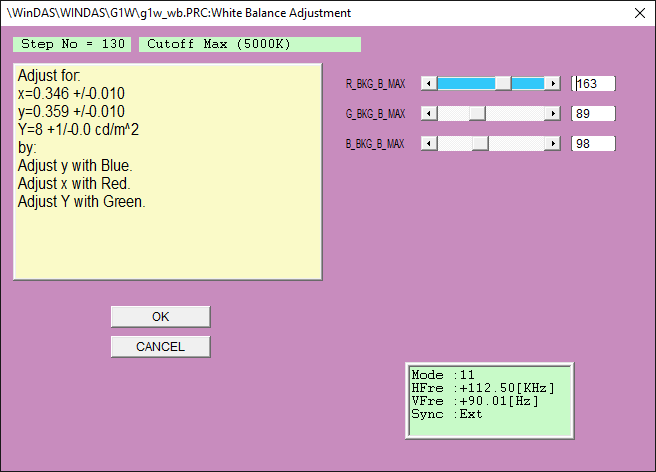
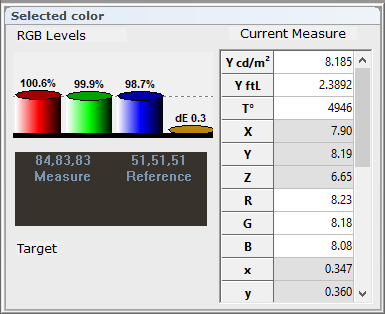
- click any IRE value besides 0 and start a continuous measure
- Match the target luminance and prioritize lower dE
-
Close the current measure, and reopen HCFR in automatic mode
-
Adjust Drive (first round)
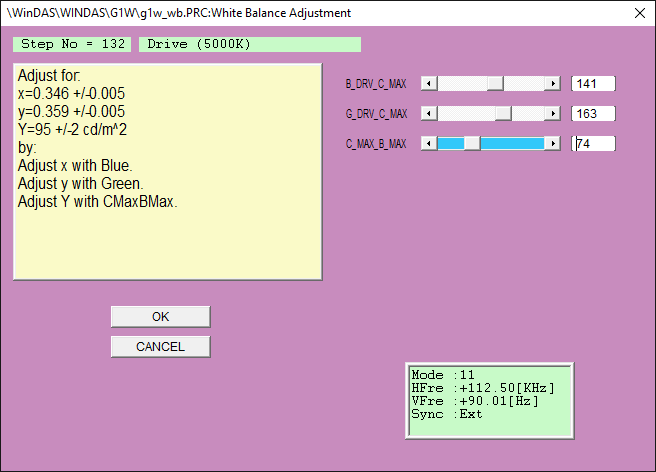
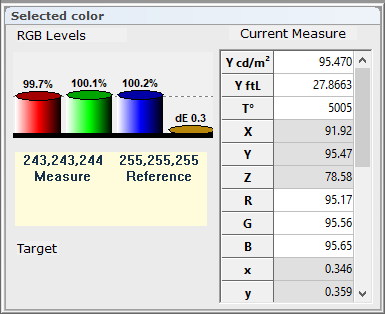
- Click on 100IRE and start a continuous measure
- Match the target luminance and prioritize lower dE
-
Adjust Cutoff Minimum
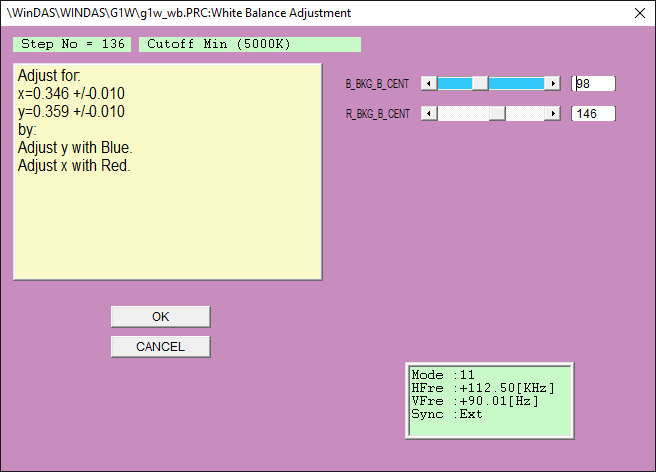
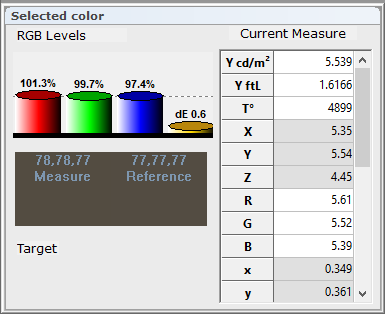
- Click on 30IRE and start a continuous measure.
- Prioritize lowest dE
-
Adjust Drive (second round)
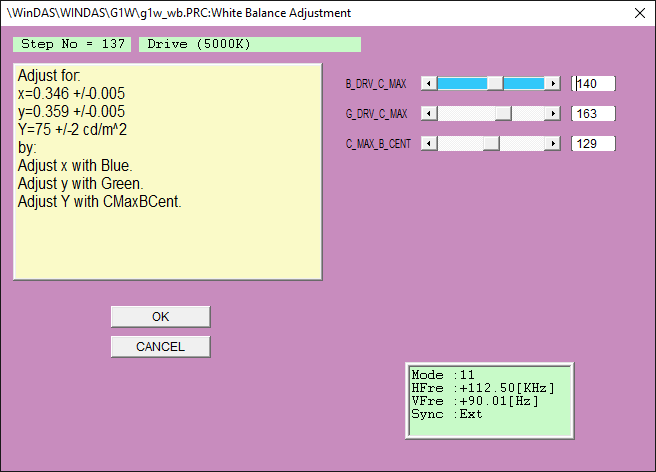
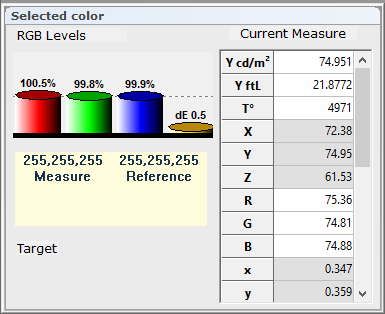
- Click on 100IRE and start a continuous measure
- Match the target luminance and prioritize lower dE
-
Check Luminance
- Click OK to continue
-
Adjust Contrast Minimum
- Continue measuring on 100IRE
- Match the target luminance and prioritize lower dE
-
Wait for the luminance to stabilize
- Continue measuring on 100IRE
- Wait around 15 to 30 seconds for the luminance to stay consistent
- Click OK
-
There will be several prompts to confirm tracking
- Click OK to continue through to the next color temperature
sRGB
-
sRGB Luminance
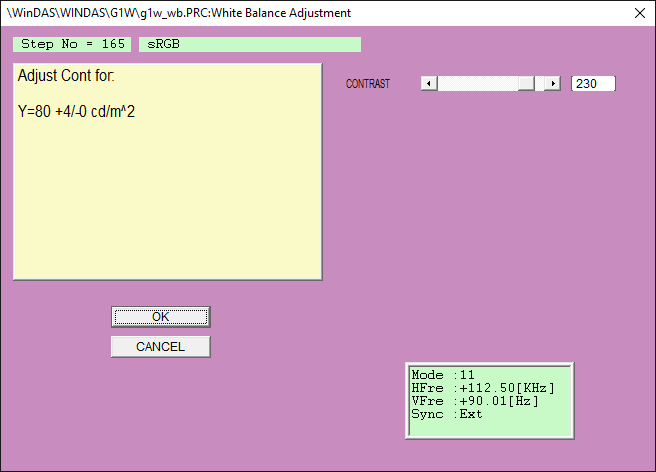
- Continue measuring on 100IRE
- Match the target luminance
Completion
- Finish procedure
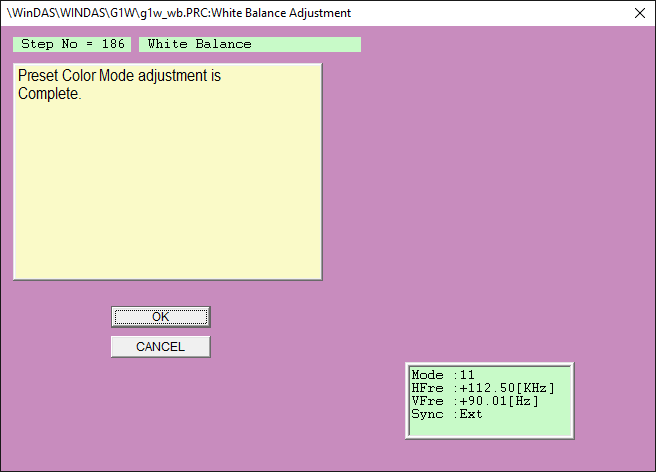
- Click OK to complete the WPB procedure