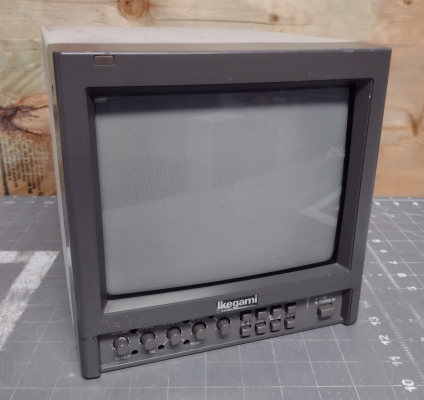
Ikegami TM-950DU
September 21, 2024, 10:23 pm
December 27, 2024, 2:07 am
Summary
Portable 9" broadcast monitor with a low TVL slot mask tube, dual composite inputs, and a built in SDI input card.
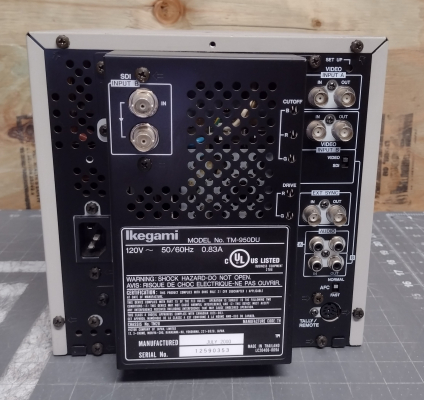
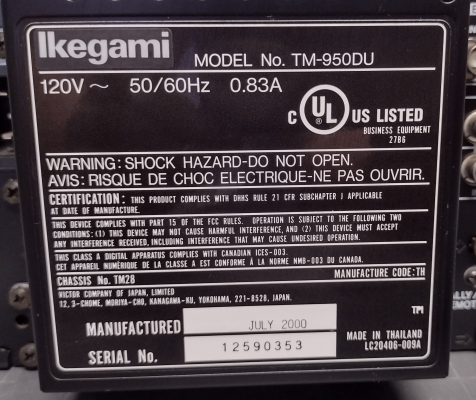
This monitor was manufactured by JVC, and is identical to the JVC-branded version. It is a modified version of the JVC TM-910SU. Unlike its analog predecessor, its S-Video input has been disabled and, in its place, a digital SDI input module has been added.
Manuals
Notes
Later production runs of these monitors were rebranded as the Ikegami TM9-1D, although the design remained the same.
These monitors often have a noticeable horizontal bowing, due to misalignment of the yoke. This can be corrected by tilting the yoke upwards and reseating the rubber wedges.
S-Video Input Restoration Mod
The metal enclosure on the back of the monitor contains a 5V power supply and an SDI to Y/C converter, which together provide its SDI input capability. Aside from these additions, the rest of the monitor is largely identical to the TM-910SU, and will function perfectly well without the SDI module. Restoring the S-Video input can be done with a simple mod, and will result in a noticeably cleaner picture.

As can be seen on the schematic, the SDI converter connects to the input board via a 4-pin connector (CN008).
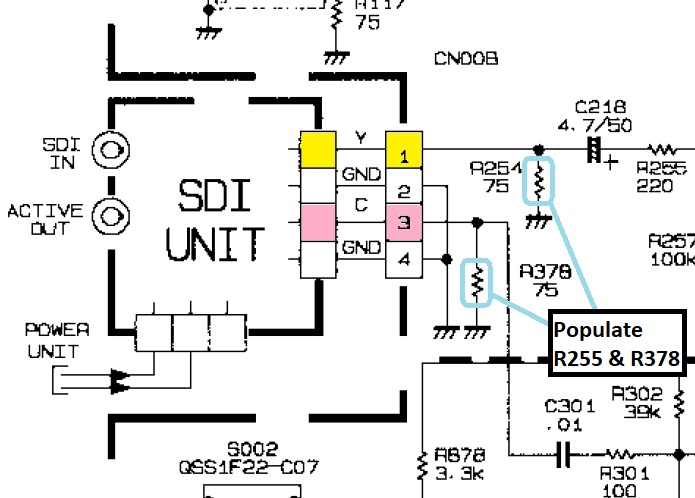
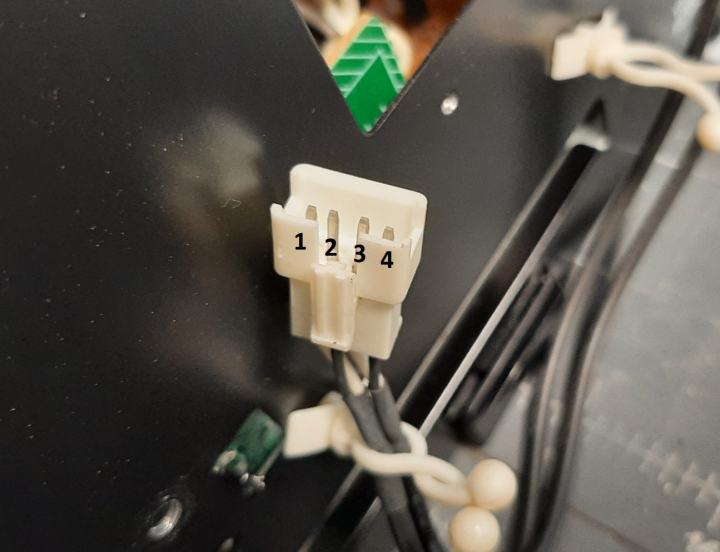
The luma and chroma signals each have a 75 ohm terminating resistor (R255 and R378 respectively). This area of the board is located directly behind the Video/SDI switch.
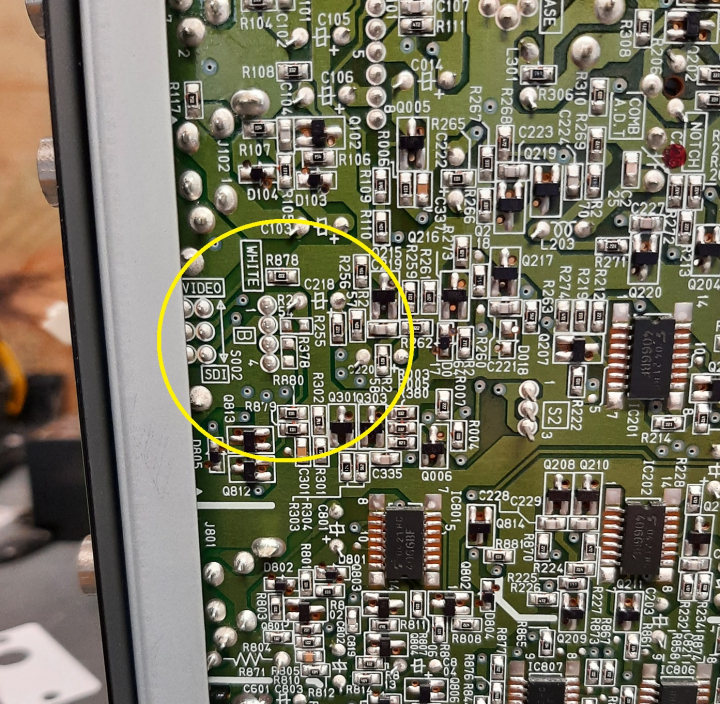
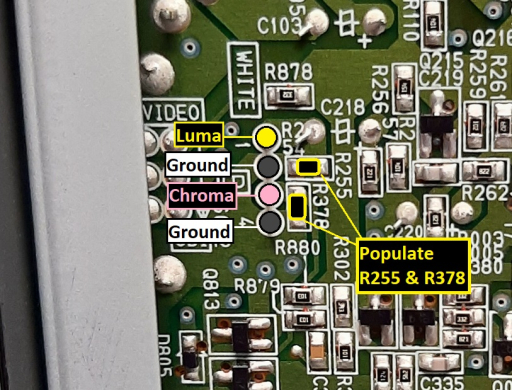
On later revisions of this monitor, R255 and R378 are not present and must be populated for the mod to work properly. If you are using through hole resistors, it's easier to solder them directly to the Y/C input pins:

If SDI capability is no longer needed, the first step of the mod should be to remove the SDI and power modules. This will reduce heat inside the monitor, and the SDI module can be repurposed to simplify mounting of the S-Video port.
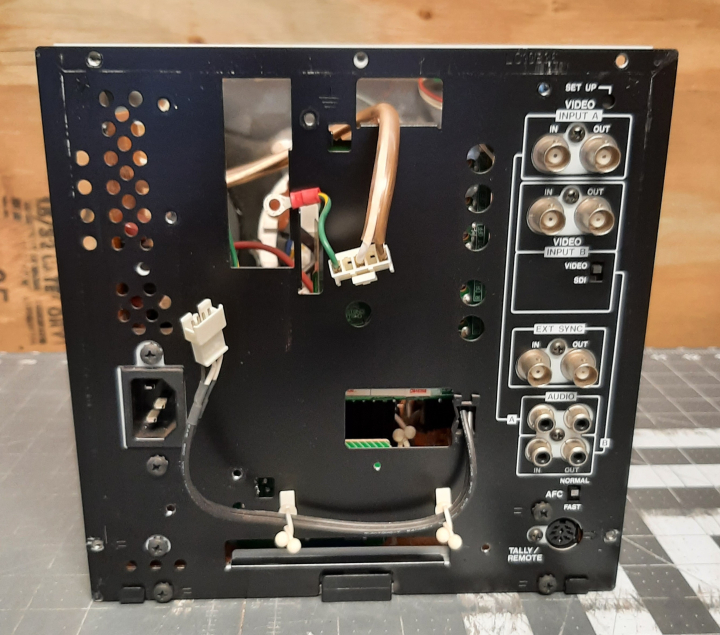
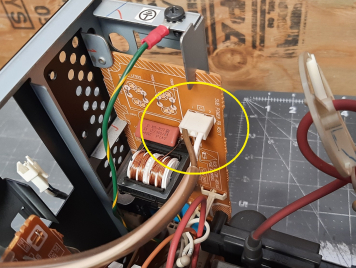
Once the modules are removed, the AC mains cable for the power supply should be removed. If you don't need to reuse it, it can simply be cut off at the connector.

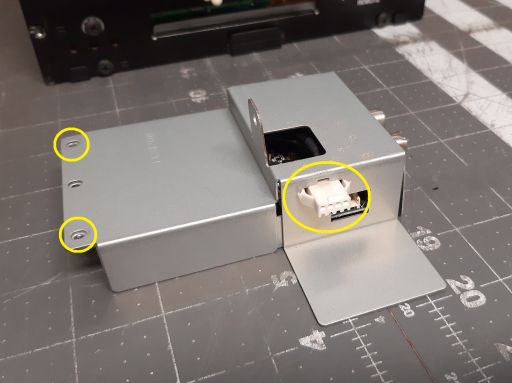
If the SDI module is no longer needed, it can be disassembled and reused as part of the S-Video mod. It can be taken apart by removing two screws at the end and pushing the Y/C connector in through the housing. Then, the cable can be removed with wire cutters and kept for later.
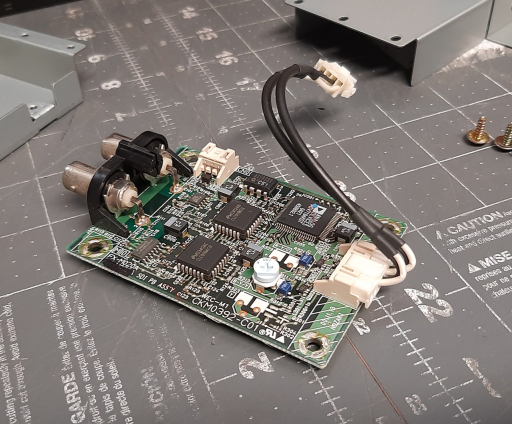
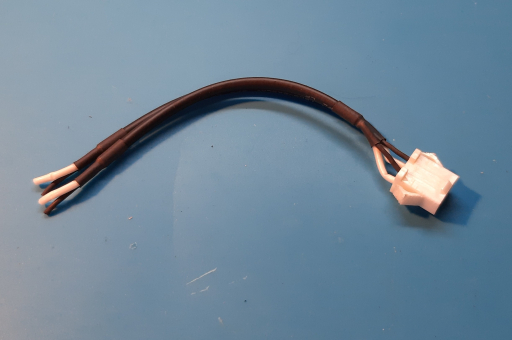
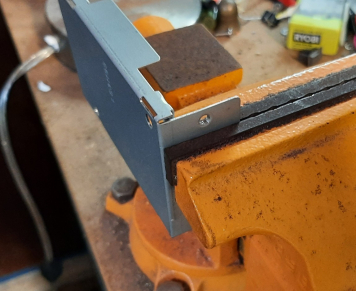
Next, take the metal housing and grip the face plate in a vise or large pair of pliers. Bend the joint back and forth several times and it should break off cleanly.
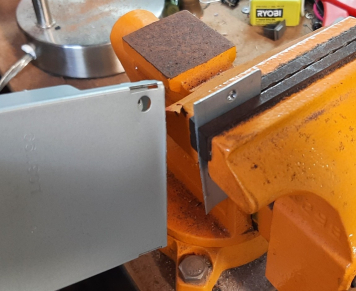
The holes for the BNC connectors are almost big enough for a panel mount S-Video jack. If the top hole is enlarged slightly with a round file, it should fit right in.


Now, a cover plate can be cut from a piece of thin plastic. I used the cover from a cheap binder. Trace the outline with a pencil and cut holes for the S-Video jack and mounting screws. The two pieces will be sandwiched together when the connector is mounted.
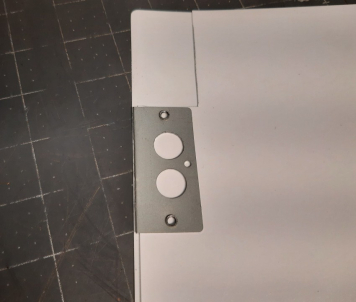

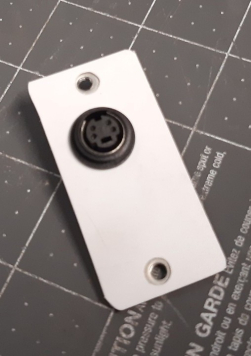

The Y/C cable from the SDI converter can now be soldered to rear of the S-Video jack.
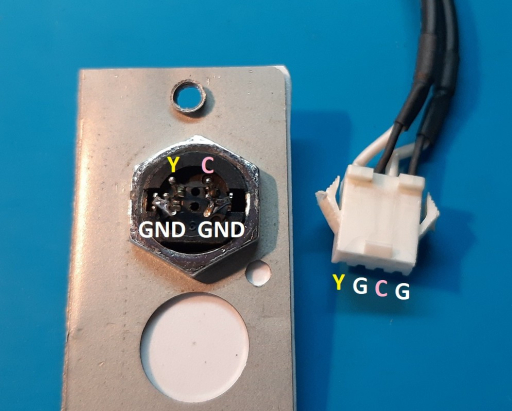
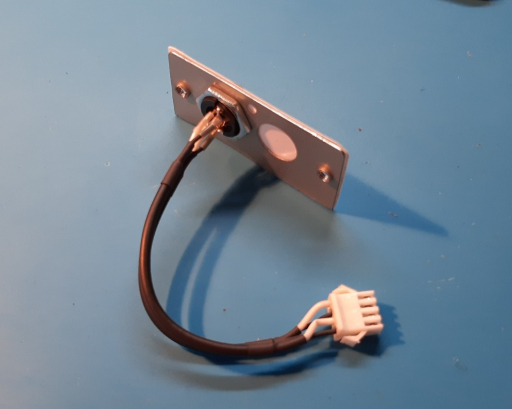
With the cable in place, the plate can be attached with the original mounting screws and the cable secured to the side of the case with a small zip tie.
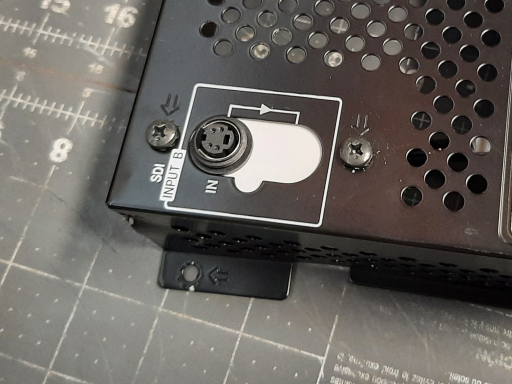

Now, the Y/C cable can be reconnected and the rear enclosure attached.
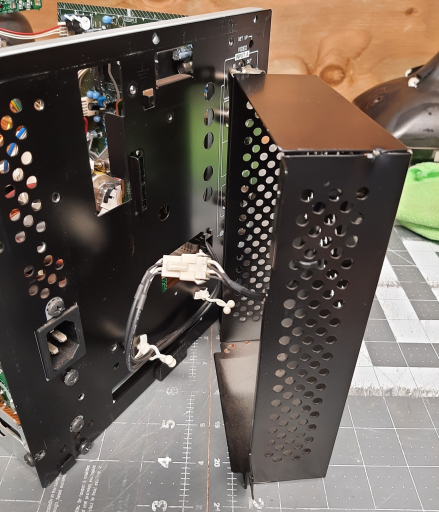
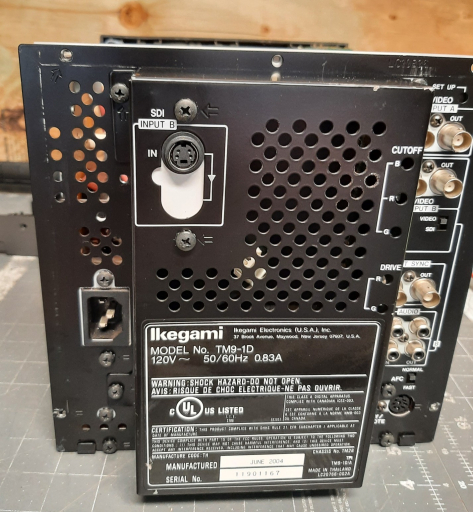
With the monitor reassembled, set the Input B selection switch to SDI, and it will display a very clean picture through S-Video. Brightness and chroma levels may be slightly different from composite, which can be adjusted on the front panel.
Gallery


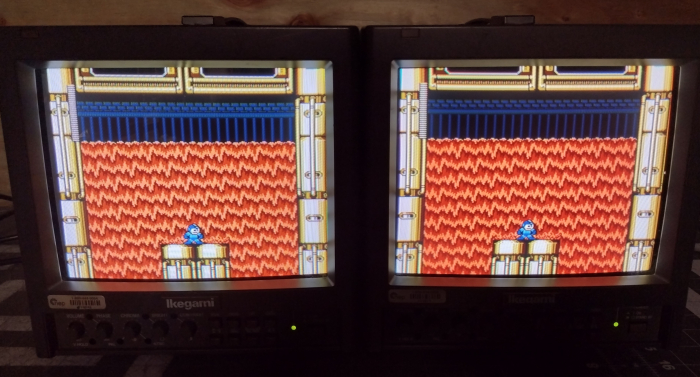
| Specifications | |
|---|---|
| Brand: | Ikegami |
| Manufacturer: | JVC |
| Model: | TM-950DU |
| Series: | TM |
| Viewable Size: | 9" |
| Input Signals: | Composite, SDI |
| Sync: | CSYNC |
| Native Resolutions: | 240p, 480i |
| Linecount: | 280 TVL |
| Horizontal Scan Range: | 15 kHz |
| Vertical Scan Range: | 50 Hz, 60 Hz |
| Formats: | NTSC, PAL |
| Aspect: | 4:3 |
| Adjustments: | Internal Potentiometers, External Potentiometers |
| Horz. Output Transistor: | 2SD1878 |
| Vertical Output IC: | LA7830 |
| Jungle IC: | AN5613, AN5625N |
| Flyback: | CJ28347-00C, CJ28347-00B |
| Tube: | Panasonic , A22JWG098X |
| Heater Voltage: | 6v |
| Deflection: | 90° |
| Mask: |
Slot

|
| Pitch: | 0.5 mm |
| Tint: | Dark |
| Removable Glare Film: | No |
| Yoke: | CE20300-00A |
| Yoke Horz. Inductance: | 4.175 mH (@ 10 kHz) |
| Yoke Vert. Inductance: | 24.87 mH (@ 100 Hz) |
| Yoke Horz. Resistance: | 5.6 ohm |
| Yoke Vert. Resistance: | 15.2 ohm |
| Speakers: | Mono |
| Chassis: | B10 |
| Weight: | 17 lbs (7.7 kg) |
| Dimensions (W/H/D): |
222 x 230 x 370 mm
(8.7 x 9 x 14.5") |
| Application: | Professional |
| Cabinet Material: | Metal |
| Launched: | 2000 |
| Country of Manufacture: | Thailand |
| Mounting: | Rackable |
| Mods: | S-Video |
| Degaussing: | Automatic on Power-on |
| Tag: | Needs Pictures |
 This work is licensed under a