
Summary
Rebranded CCTV. Very common chassis used in monitors branded by Pelco, Sanyo, JVC, Ikegami, and others. Uses a very high resolution 800 TVL Chunghwa picture tube which looks really good over s-video and even better with an RGB mod.
Literature
- Owner's Manual
- Service Manual is unavailable. Similar CCTV service manuals do not match this board.
Notes
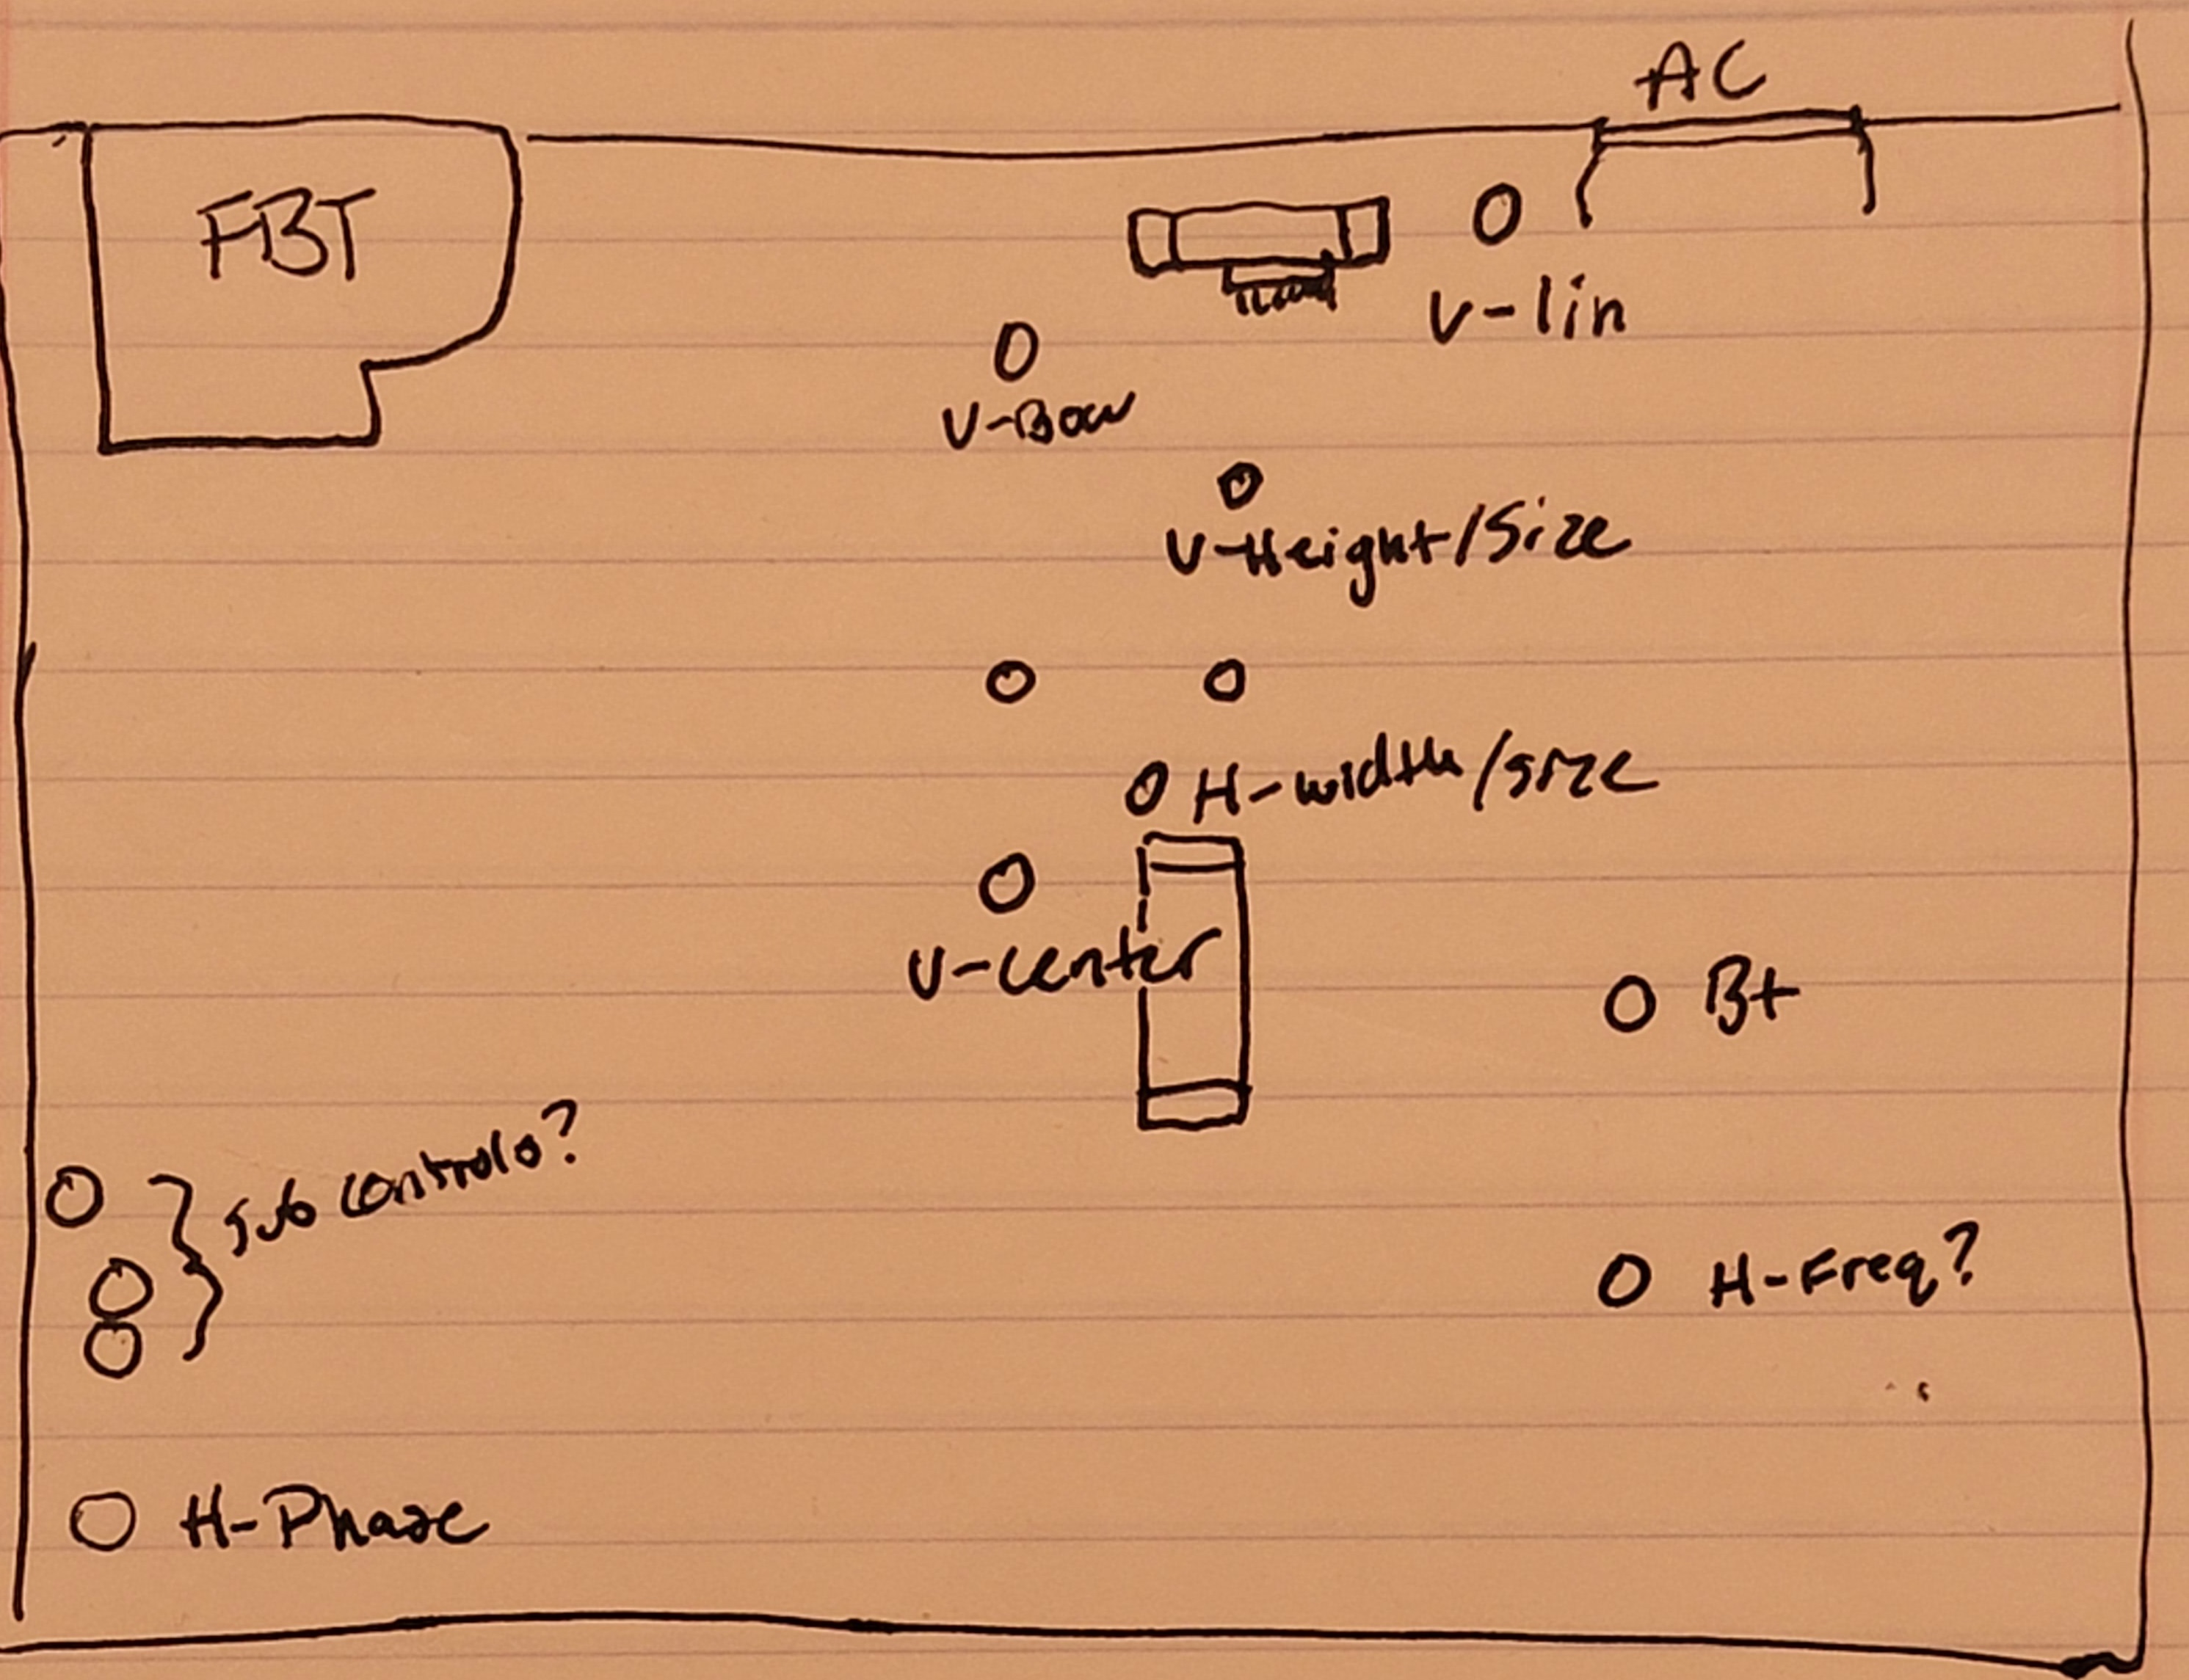
Interestingly this TV has a dual-focus flyback which means you can dial in corner focus separately from center focus. Unfortunately the small size of the CRT makes this rather pointless, as the corner focus pot must be turned to its max setting to achieve normal corner focus.
Here is a map of the adjustments I found inside on the main board. This TV provides all of the adjustments you'd hope for, including both H/V center AND H/V size! Very rare for a commercial CCTV to have all of them.
RGB Mod
Overview / Notes
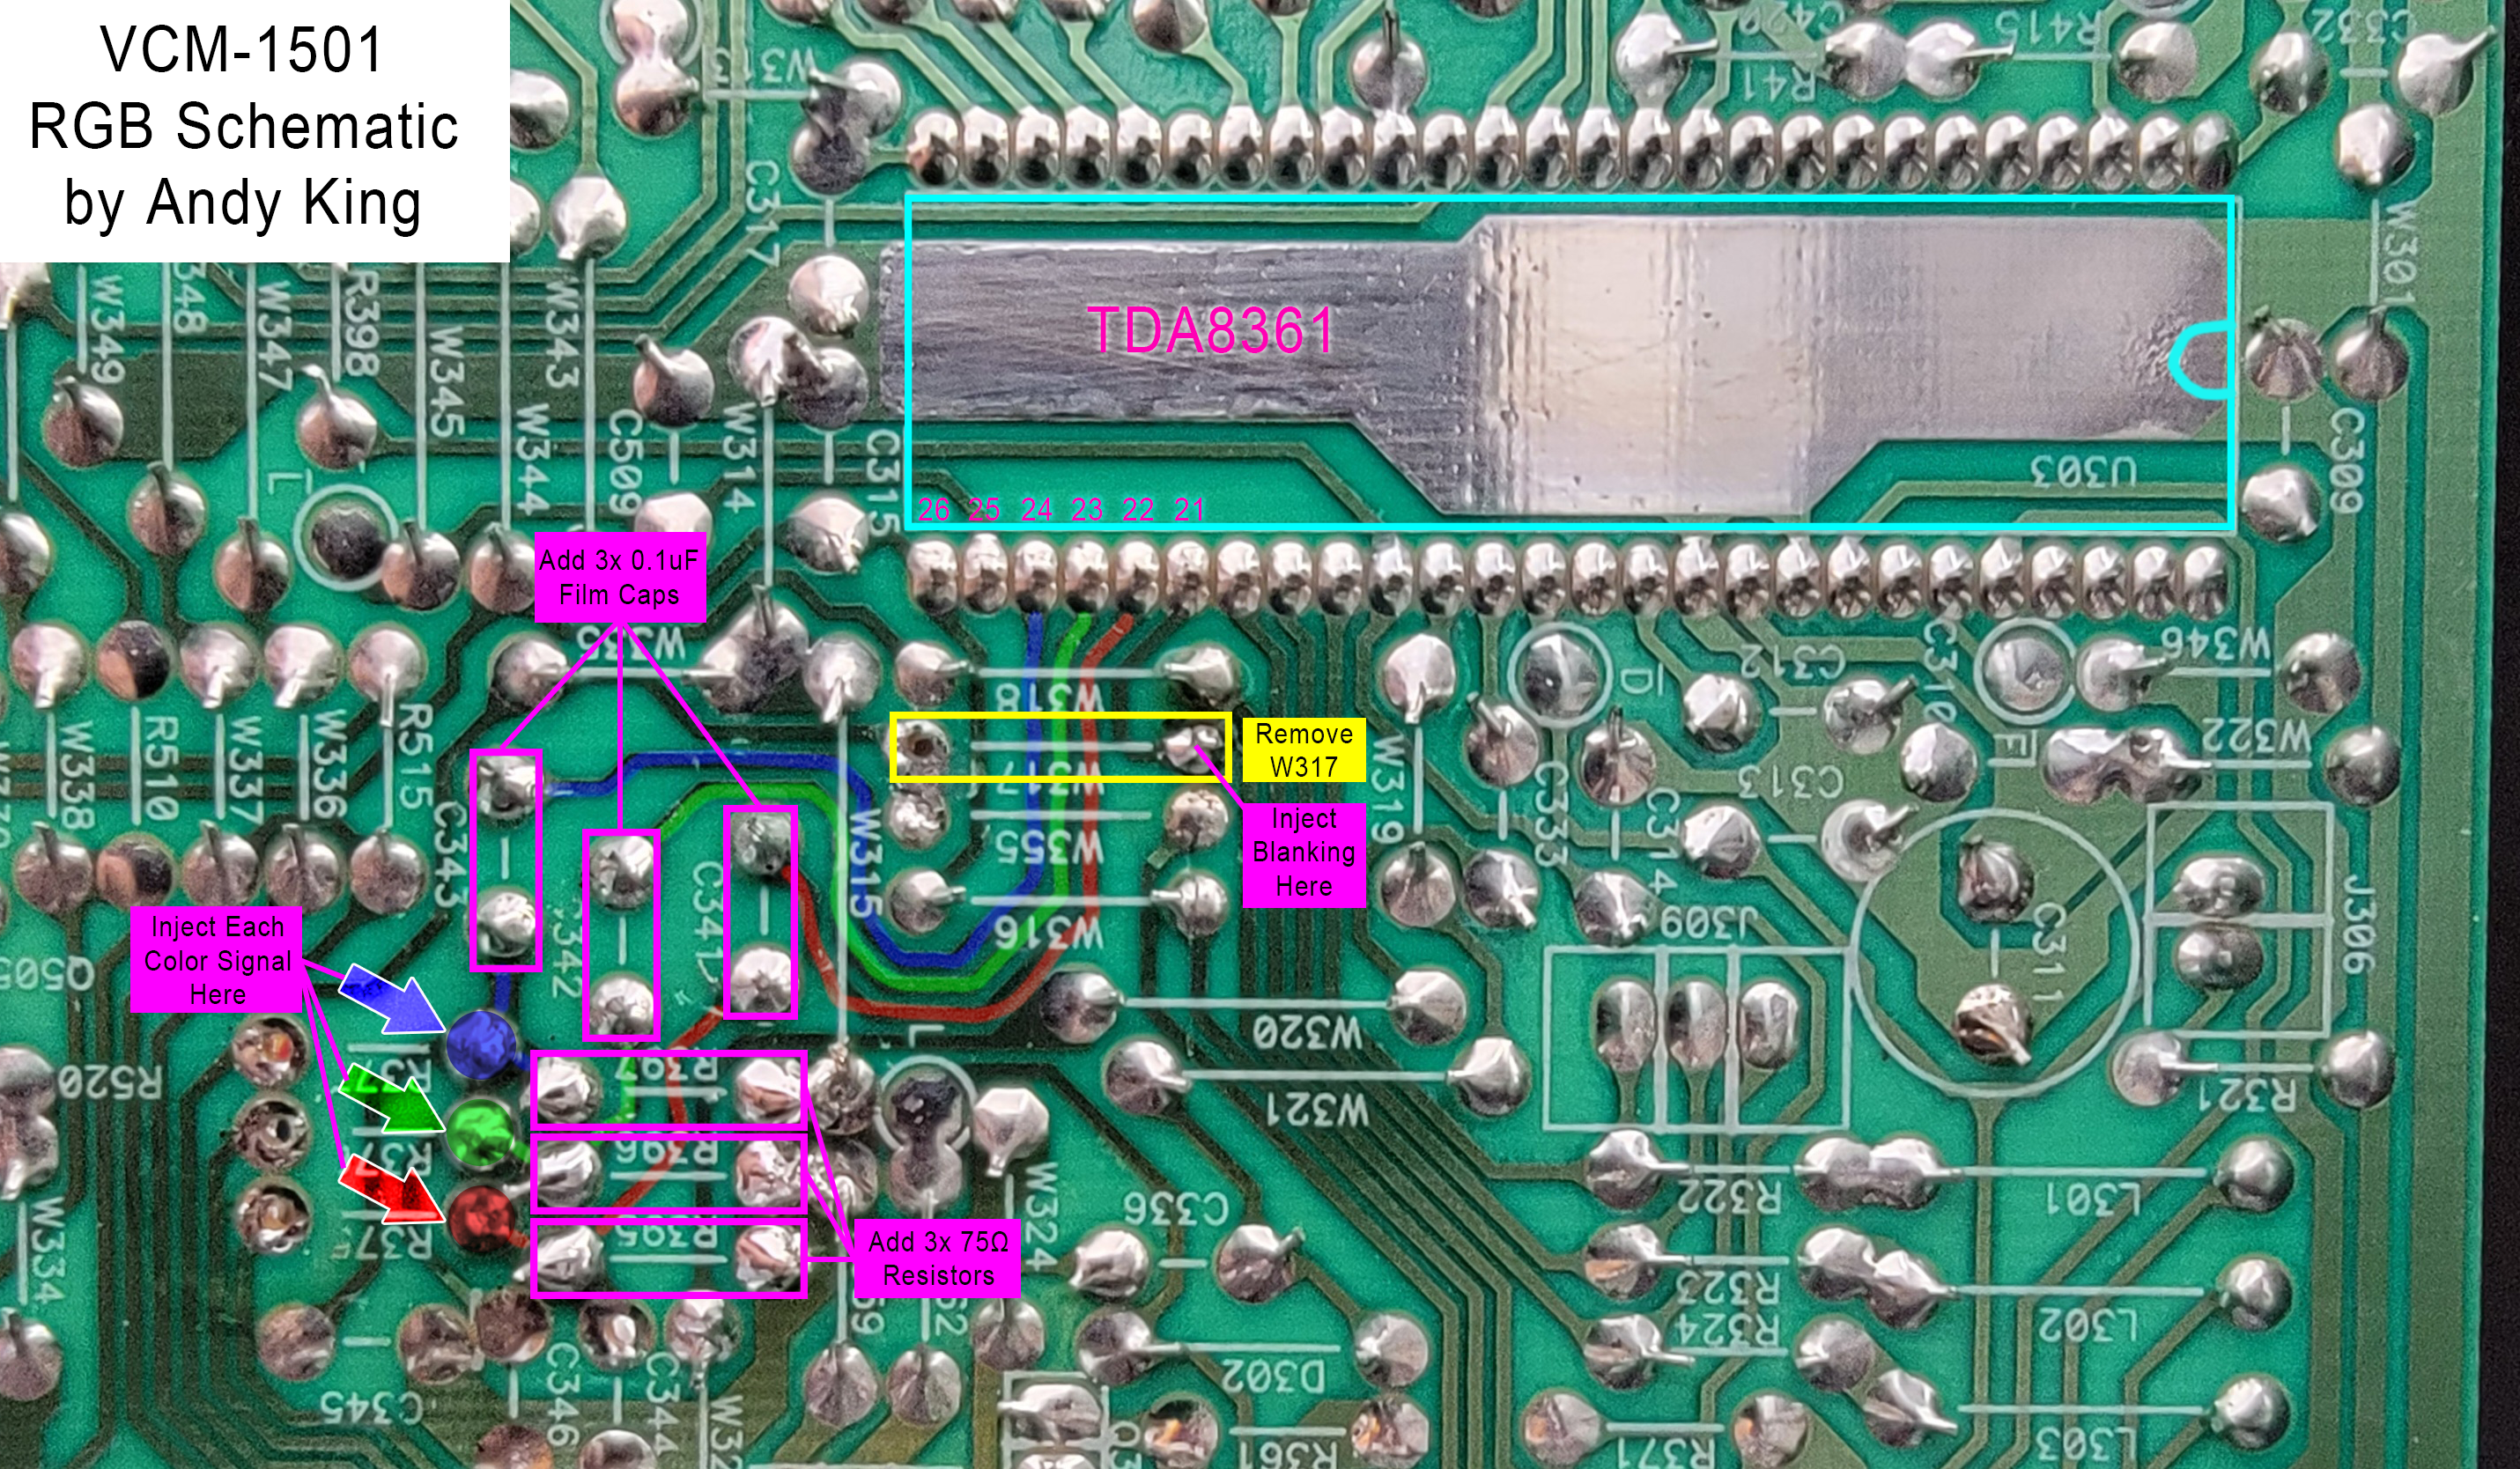
This CRT uses the excellent and easy-to-mod TDA8361 jungle chip. To do the RGB mod we need to inject terminated rgb signals to Pin 22, 23, and 24 of the jungle... conveniently there are already pads for your 0.1uF coupling capacitors and 75ohm termination resistors so we will use those.
Pin 21 is the blanking pin and it's tied to ground from factory so we will need to remove a jumper before injecting our 0.7-3v blanking voltage - see schematic below for which jumper to remove. Your blanking voltage cannot exceed 3v or the video output from the jungle will be disabled. Your blanking voltage must be at least 0.7v to engage the RGB inputs. I suggest following my blanking instructions below to use the "input 2" switching voltage for blanking so that you can retain the other two inputs even when an active RGB source is connected to the TV.
TDA8631 Injection Schematic
Blanking Instructions
We are going to use the input switching voltage for blanking. The switching voltage is 12v and is routed through the physical switch on the front of the monitor back to the input board NAND gate. It is very low current and trying to draw from it improperly will result in your sync input not working anymore because the NAND logic will fail. So we need to take our very small blanking voltage and no more, no less :) We are aiming for ~0.8v and will use a potentiometer to do it.
Find any potentiometer you have of at least 10K resistance (I used this one) and attach one of the side legs to ground, the other side leg to the input B logic signal, and the center leg to your blanking wire that goes to the blanking injection point W317 shown in the TDA8361 schematic above. Once you have it connected, attach the positive probe of a multimeter to your pot's center leg and attach the negative lead to any ground point of the chassis. Clip leads help with this.
Set your multimeter to DC Voltage mode and turn the TV on - watch the voltage as you turn the pot and turn it down until you get to our target voltage range of 0.7v to 3v. If you already have your RGB signals connected properly and have the TV set to input 2 you should see your RGB signal come through once you hit the target blanking voltage range.
![]()
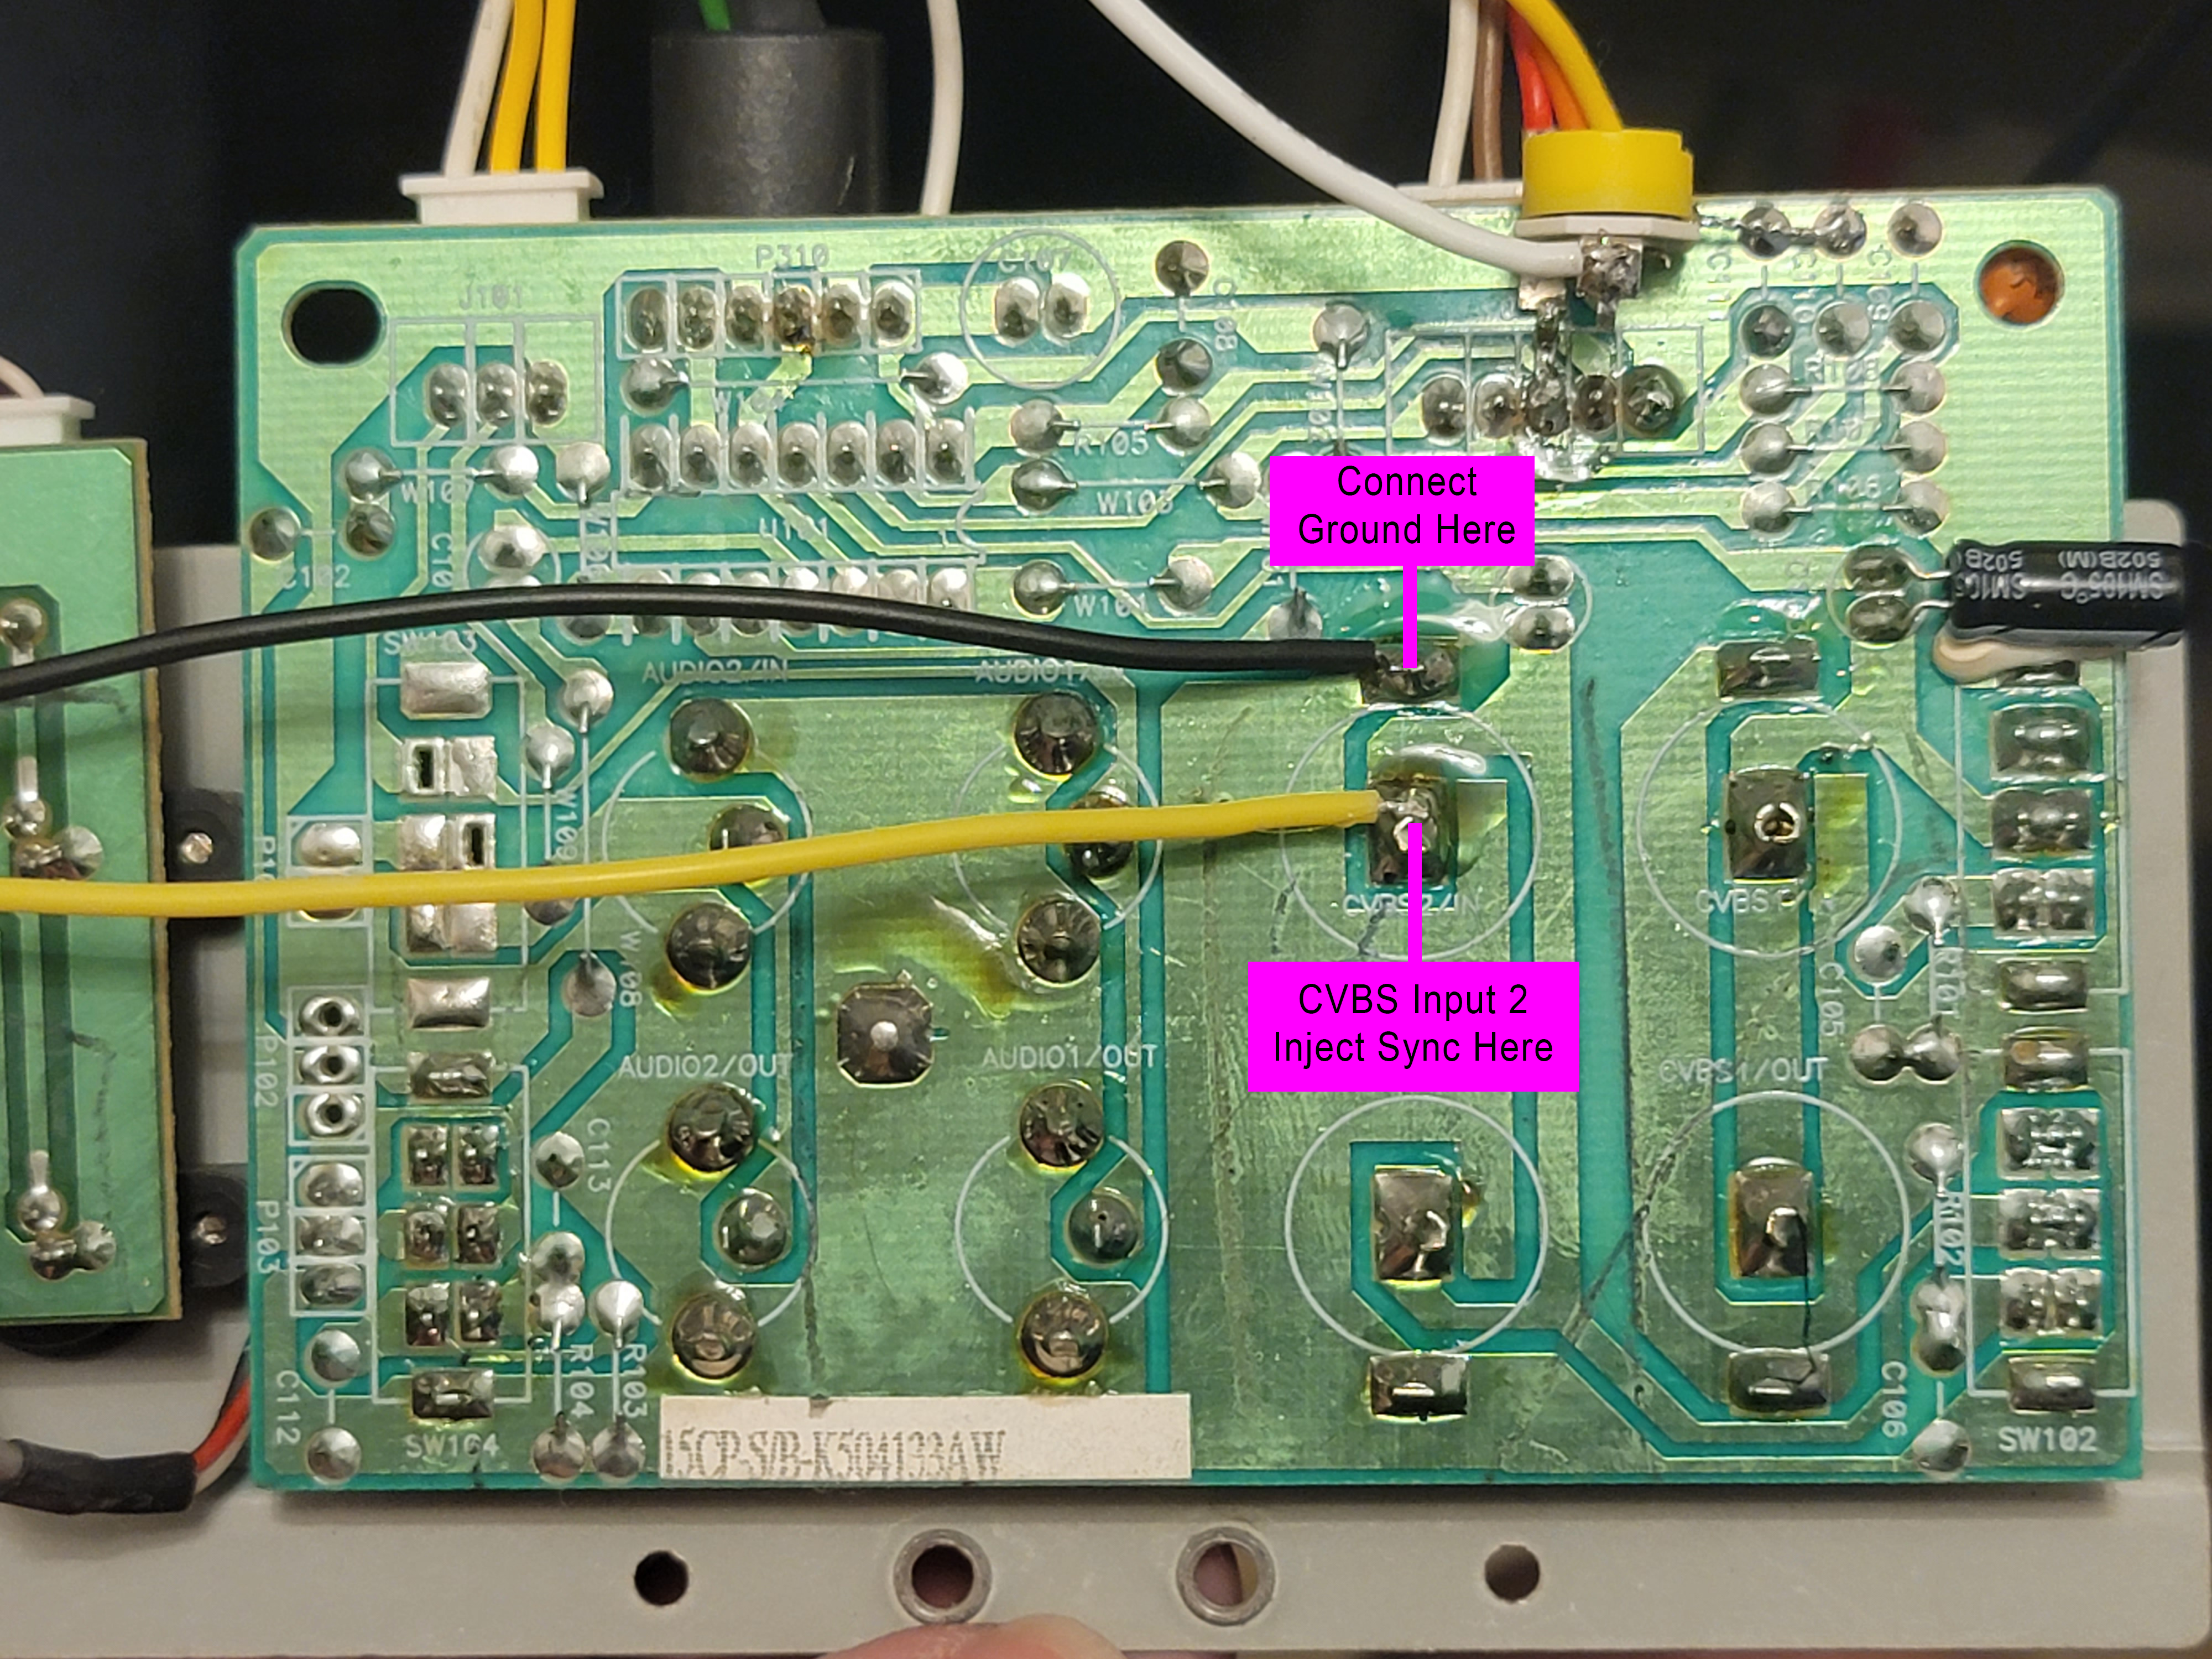
Sync
Sync must be injected to one of the video inputs on the video input board. If you are following my instructions for Input B as the RGB input, you'll want to attach sync to "CVBS In 2" on the input board as shown in the following image. If you are using Input 1 or Y/C then adjust accordingly.
Drilling the holes for BNC jacks
For instructions on drilling out BNC holes for your input jacks, see this guide on the Sanyo VMC-8614.
Dealing with shift/horizontal position differences
If you chose to use composite input for sync (which let's face it, why would you ruin the s-video input on this?) you probably notice that your RGB signal is shifted to the right farther than the stock inputs now. My solution to this was to just route the h-phase pot to a new location so that it could be adjusted on the fly.
The H-Phase pot is VR501, the one furthest in the corner near the jungle chip (see map image above if you can't find it). It's a 10K pot - you can either reuse it, which I don't suggest since it's not meant to be panel-mounted, or you can buy a 10K panel mount pot off of Digikey or Mouser. Simply run wires from the pads of the removed pot to the new pot you mount externally.
RGB Gallery
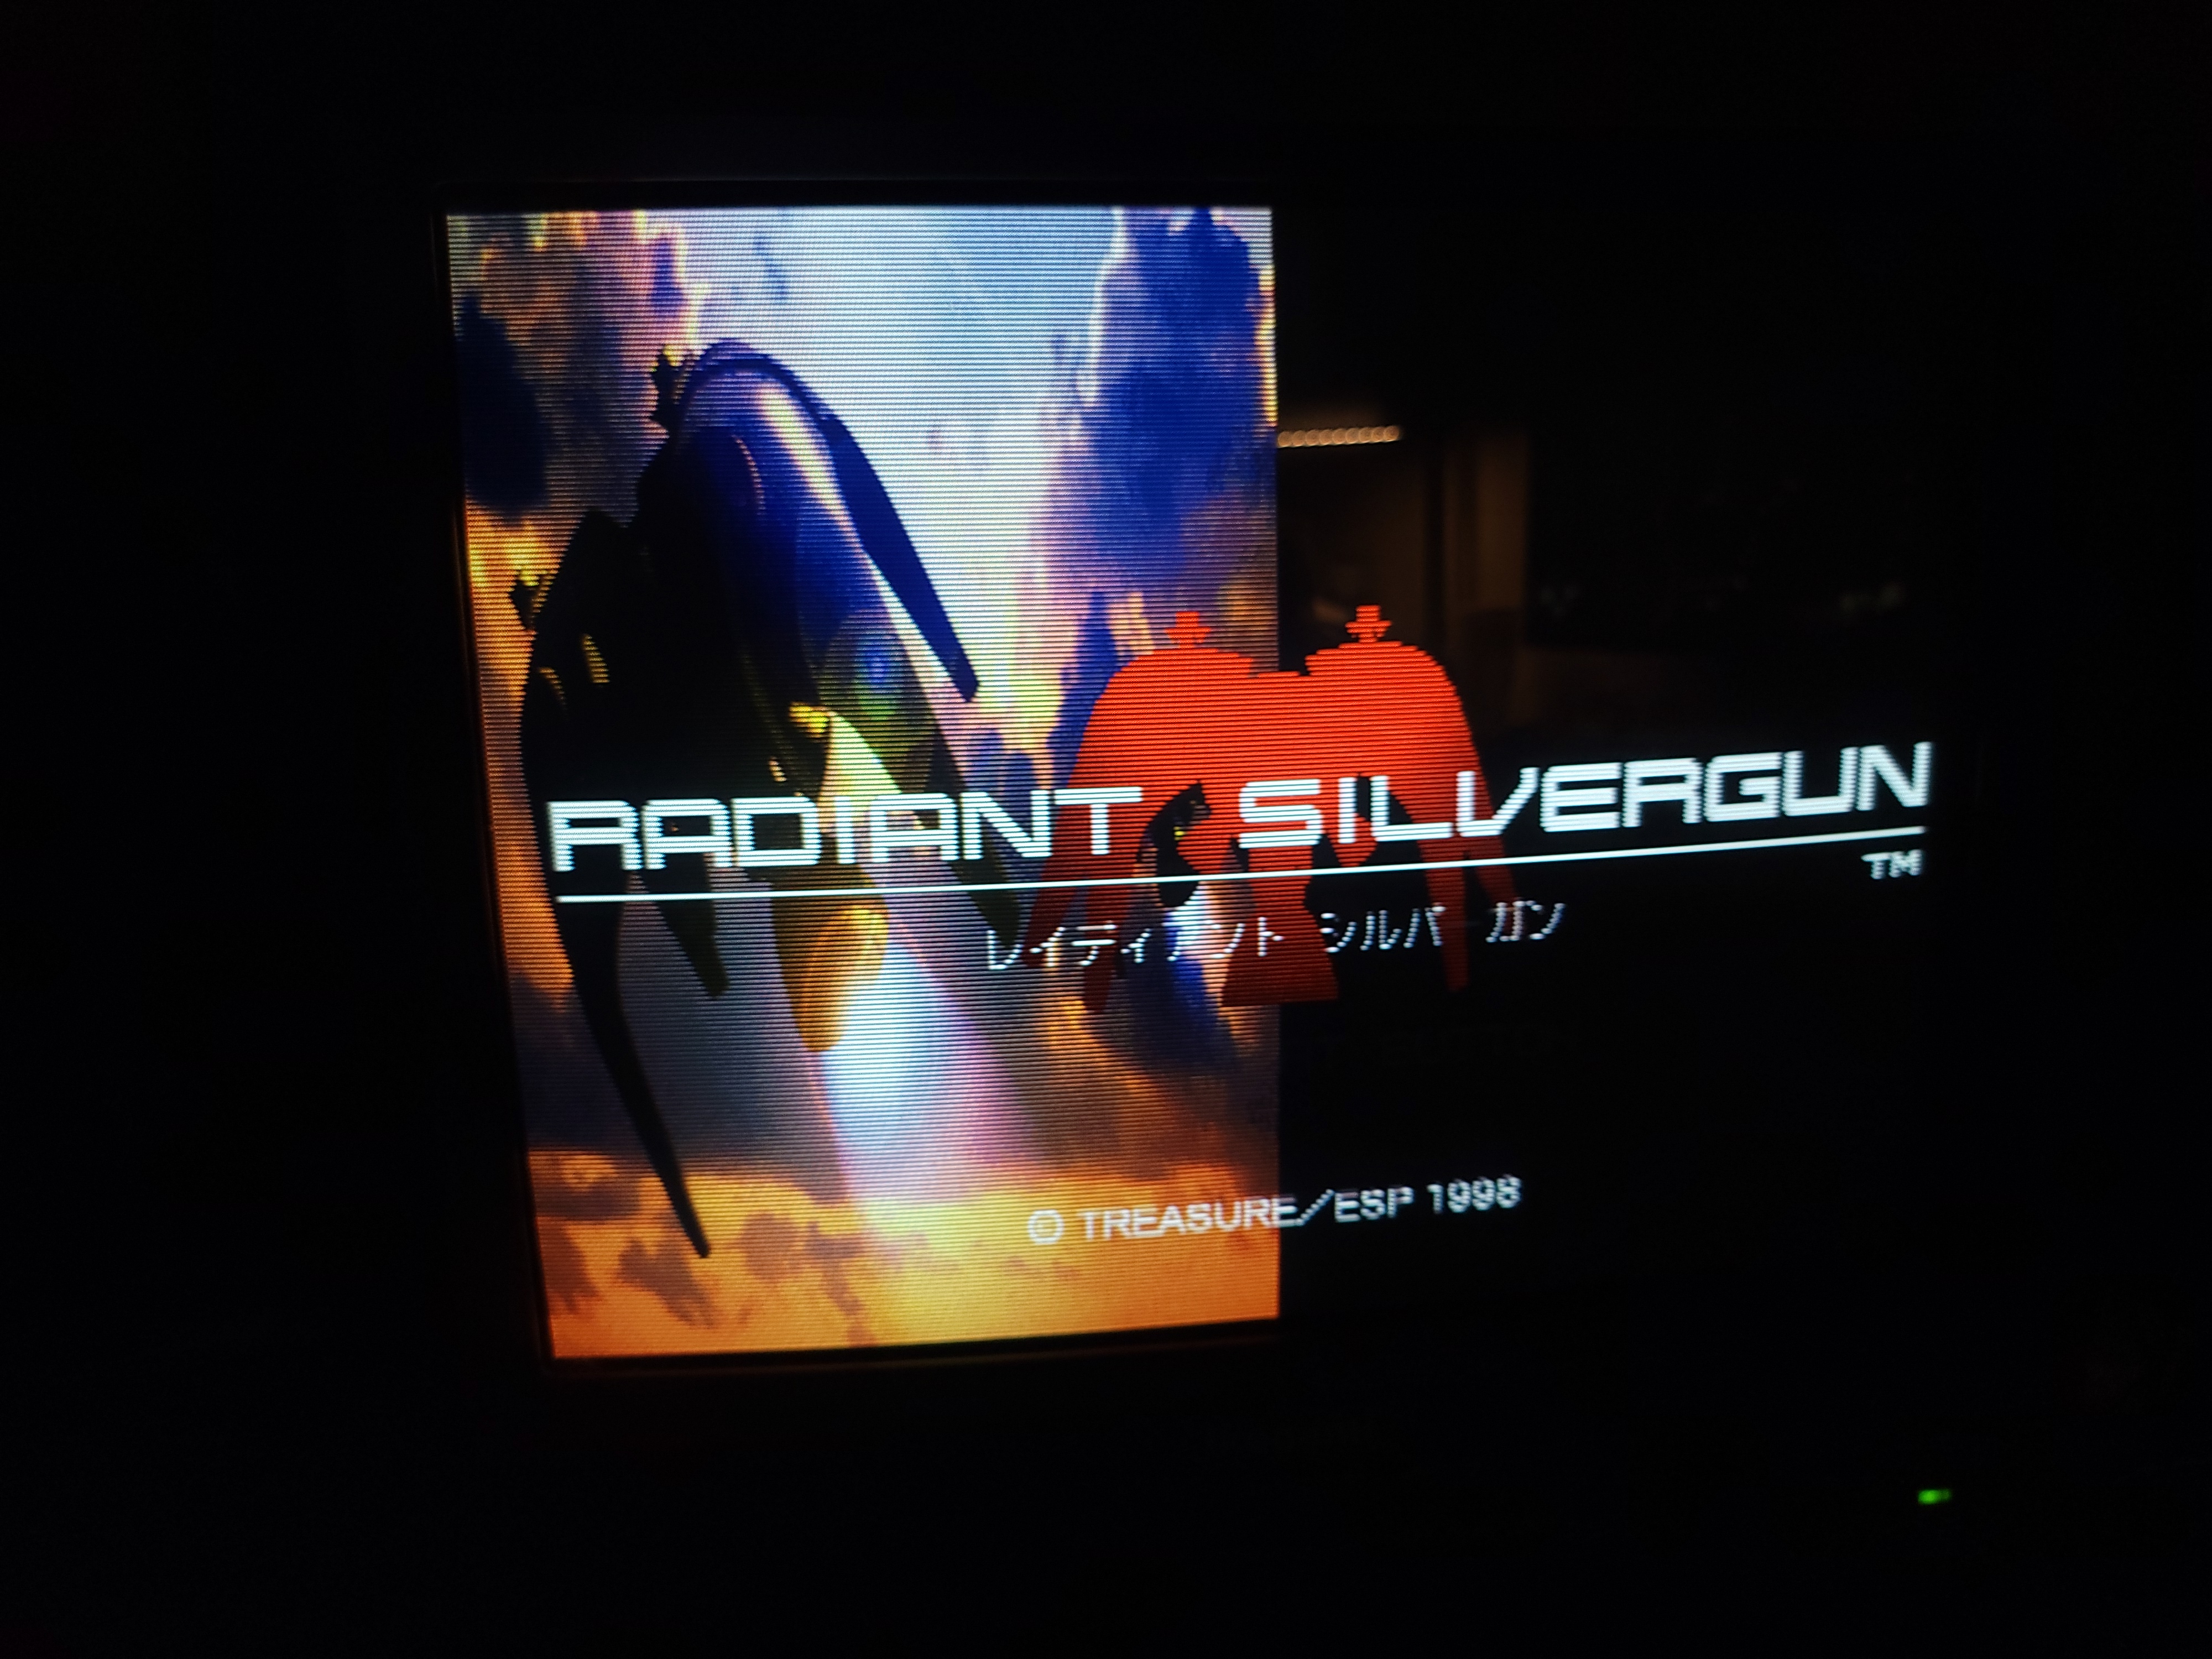


Gallery


| Specifications | |
|---|---|
| Brand: | Ikegami |
| Manufacturer: | Ikegami |
| Model: | 1501 |
| Series: | VCM |
| Viewable Size: | 14" |
| Input Signals: | Composite, S-Video |
| Native Resolutions: | 240p, 480i |
| Linecount: | 800 TVL |
| Formats: | NTSC |
| Aspect: | 4:3 |
| Adjustments: | Internal Potentiometers, External Potentiometers |
| Jungle IC: | TDA8361 |
| Focus Type: | Single |
| Tube: | Chunghwa , M36AES13X46 , M36AES13X |
| Deflection: | 90° |
| Mask: |
Shadow

|
| Pitch: | 0.27 mm |
| Speakers: | Mono |
| Application: | Professional |
| Cabinet Material: | Metal |
| Country of Manufacture: | China |
| Mounting: | Rackable |
| Mods: | RGB via Direct |
| Degaussing: | Automatic on Power-on |